

Navigating a computer can sometimes feel like learning a new language, especially with operating systems constantly updating. Windows 11, the latest version of Microsoft’s popular operating system, brings a fresh look and new ways to interact with your computer. While these changes might seem daunting at first, they make your computer experience more intuitive and enjoyable once you understand the basics.
This guide will walk you through your Windows 11 desktop, explaining each key area clearly and simply. We break down the main components, provide practical advice, and help you feel more confident and in control of your machine. You will discover how to locate your programs, manage your files, and customize your digital workspace. Consider this your friendly roadmap to mastering your Windows 11 computer.
Table of Contents
- Your Windows 11 Desktop: Your Digital Workspace
- Exploring the Taskbar: Your Control Center
- The Start Menu: Your Gateway to Everything
- Working with Windows: Opening, Closing, and Arranging Apps
- Understanding Files and Folders: Keeping Your Digital Life Organized
- Personalizing Your Desktop: Making Windows 11 Truly Yours
- Keeping Windows 11 Healthy: Updates and Maintenance
- Troubleshooting Common Problems and Simple Solutions
- Frequently Asked Questions
- When and Where to Find More Help
Your Windows 11 Desktop: Your Digital Workspace
Think of your computer’s desktop as your main workspace, much like a physical desk. When you turn on your Windows 11 computer and log in, this is the first screen you see. It provides the background, icons for quick access to programs, and the taskbar at the bottom of the screen.
If you find the icons or text a bit small, you can always make your computer screen easier to read by adjusting the display size.
What You’ll See On Screen:
- Background Image: This is the picture or color filling your entire screen. You can change this to something you enjoy, making your computer feel more personal.
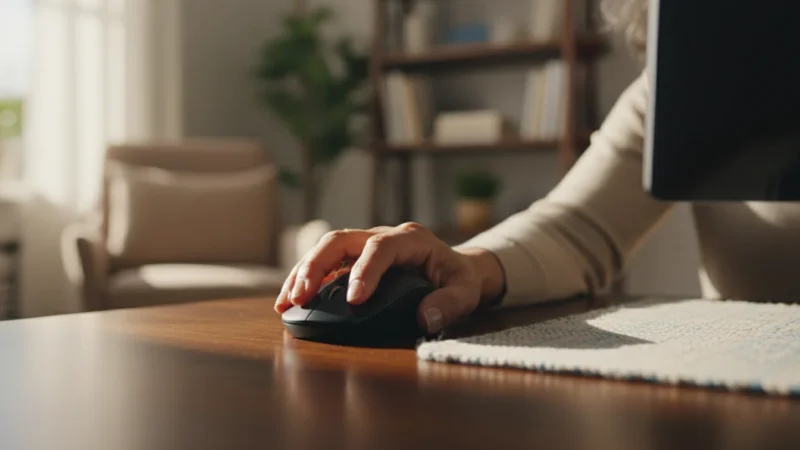
- Icons: These small pictures represent programs, files, or folders. To open a program represented by an icon, you typically double-click it. Double-clicking means pressing the left mouse button twice quickly. For example, you might see an icon for “Recycle Bin,” which holds files you have deleted.
- The Taskbar: This horizontal bar sits at the bottom of your screen. It is a central hub for navigating your computer, containing the Start button, search, and icons for programs you use frequently or have open. We will explore the taskbar in more detail next.
Your desktop offers a welcoming starting point. Take a moment to observe it, noticing the icons and the taskbar. Familiarity comes with gentle exploration, and you already make progress simply by understanding this initial view.
Exploring the Taskbar: Your Control Center
The taskbar is the horizontal strip at the bottom of your Windows 11 desktop. It serves as your control center, providing quick access to essential features and showing you which programs are currently open. In Windows 11, the taskbar icons are centered by default, a subtle but significant change from previous Windows versions.
What You’ll See On Screen:
-
Start Button (Windows Logo): Located on the far left of the centered icons, this is perhaps the most important button on your entire computer. When you click it (press the left mouse button once), the Start menu appears, giving you access to all your installed programs, settings, and power options. You use the Start button to shut down or restart your computer.
-
Search Icon (Magnifying Glass): Next to the Start button, this icon allows you to quickly find files, folders, programs, or information on your computer or the internet. Click the magnifying glass icon, then type what you are looking for into the search box that appears.
-
Task View Icon (Two Overlapping Rectangles): This feature helps you manage multiple open programs and virtual desktops. Clicking it shows you all your open windows, allowing you to switch between them easily. It also allows you to create separate “desktops” for different tasks, helping you organize your work.
-
Widgets Icon (Weather/News Icon): On the far left of the taskbar (not part of the centered group), this icon opens a panel displaying personalized information like weather, news, sports scores, and more. It offers a quick glance at information relevant to you without opening a web browser.
-
Pinned Apps: These are icons for programs you use frequently, such as your internet browser, email program, or word processor. You “pin” them to the taskbar for quick access. A single click on a pinned app icon opens the program. If a program is already open, its icon will appear on the taskbar, often with a line or indicator beneath it, showing it is active.
-
System Tray (Far Right): This area contains small icons that provide information about your computer’s status and quick access to system functions. Here you will find:
- Time and Date: Always visible, click it to see a calendar and notifications.
- Network Icon (Globe or Wi-Fi symbol): Shows your internet connection status. Click it to connect to Wi-Fi networks.
- Volume Icon (Speaker): Click it to adjust your computer’s sound volume.
- Battery Icon (Laptop only): Displays your laptop’s battery level.
- Action Center (Notification Icon or small chat bubble): Shows notifications from your apps and provides quick settings like Wi-Fi, Bluetooth, and brightness controls.
To open any of these icons or buttons, you simply click them. Right-clicking an icon (pressing the right mouse button once) often brings up a special menu with more options related to that item.

The Start Menu: Your Gateway to Everything
The Start menu in Windows 11 has a redesigned look compared to older Windows versions, presenting a clean, simplified interface. As mentioned, you access it by clicking the Start button, the Windows logo icon, usually centered on your taskbar. The Start menu is your primary launchpad for programs, settings, and essential computer controls.
Using the Power button correctly is just one part of basic maintenance that keeps your system healthy and fast.
Once you find your programs, learning how to save and find files will help you keep your digital documents organized.
What You’ll See On Screen:
When you open the Start menu, it displays a panel with several key sections:
-
Pinned Apps: At the top of the Start menu, you will see a grid of icons for programs that you (or your computer manufacturer) have “pinned” for easy access. These are often your most frequently used applications like Mail, Edge (the internet browser), Photos, and Microsoft Word. You can customize these by right-clicking an app to “Unpin from Start” or “Pin to Start” from the “All apps” list.
-
All apps: Located near the top right of the Start menu panel, you will see a button that says “All apps.” Clicking this reveals a scrollable list of every program installed on your computer, arranged alphabetically. This is where you find programs not immediately visible in the Pinned Apps section. To open a program from this list, you simply click its name or icon.
-
Recommended Section: Below the pinned apps, this section shows recently opened files, folders, or programs. Windows 11 learns what you use often and suggests items here, making it quicker to resume your work. For example, if you just edited a document, you might find it listed here.
-
Search Bar: At the very top of the Start menu, there is a prominent search bar. You can type directly into this bar to find programs, files, settings, or even information on the web. It is a powerful tool for quickly locating anything on your computer without having to browse through menus.
-
User Account Picture and Options: In the bottom left corner of the Start menu, you will see your user account picture (if you have one set up). Clicking this reveals options like “Change account settings,” “Lock” your computer (which keeps your programs running but requires a password to access), or “Sign out” (which closes all your programs and brings you to the login screen).
-
Power Button: Located in the bottom right corner of the Start menu, this critical button offers options for managing your computer’s power state. Clicking it reveals choices such as “Shut down” (turns off your computer completely), “Restart” (turns off then immediately turns back on, useful for fixing minor glitches), and “Sleep” (puts your computer into a low-power state, allowing it to quickly wake up where you left off).
Always use the Power button in the Start menu to shut down your computer. Turning it off by simply pressing the power button on the computer itself can sometimes lead to data loss or system errors.
Working with Windows: Opening, Closing, and Arranging Apps
When you open a program, it appears in its own framed area on your desktop, called a “window.” You often work with several windows open at once, and Windows 11 provides easy ways to manage them.
As you get used to moving windows with your mouse, you can also use keyboard shortcuts to snap windows into place even faster.
What You’ll See On Screen:
Every window typically has a few common controls in its top-right corner:
-
Minimize Button (underscore line): Clicking this button shrinks the window down to an icon on your taskbar. The program remains open and running, but it is not visible on your desktop. To bring it back, simply click its icon on the taskbar.
-
Maximize/Restore Down Button (square icon): This button changes appearance depending on the window’s current state. If the window is small, clicking the square will “maximize” it, making it fill the entire screen. If the window already fills the screen, the square icon will show two overlapping squares, and clicking it will “restore down” the window to a smaller, adjustable size.
-
Close Button (X icon): Clicking this red “X” button closes the program completely. If you have unsaved work, the program will usually ask if you want to save it before closing.
Moving and Resizing Windows:
-
To Move a Window: Click and hold down the left mouse button on the window’s title bar (the strip across the top where the program’s name appears). While holding the button, drag your mouse to move the window anywhere on your desktop. Release the mouse button when the window is in its desired position.
-
To Resize a Window: Move your mouse cursor to any edge or corner of the window. The cursor will change into a double-headed arrow. Click and hold the left mouse button, then drag the edge or corner inward or outward to make the window smaller or larger. Release the mouse button when the window is the size you want.
Snap Layouts in Windows 11:
Windows 11 introduces “Snap Layouts,” which make arranging multiple windows much easier. Instead of manually resizing each window, you can quickly arrange them into predefined layouts.
To use Snap Layouts:
- Hover your mouse cursor over the Maximize/Restore Down button (the square icon) in the top-right corner of any open window. Do not click it, just hover your mouse over it.
- A small panel will appear, showing different layout options (e.g., two windows side-by-side, three windows, four windows).
- Click the specific section of the layout where you want your current window to go.
- Windows will then suggest other open windows to fill the remaining spaces in that layout. Simply click the window you want to place in the next empty spot.
This feature helps you organize your desktop efficiently, especially when you need to view multiple documents or websites simultaneously.

Understanding Files and Folders: Keeping Your Digital Life Organized
Every document, photo, video, or program on your computer is a file. Just like you organize physical papers in filing cabinets, you organize digital files into folders. Folders are like digital manila folders that hold related files or even other folders.
File Explorer: Your Digital Filing Cabinet
You manage your files and folders using a program called File Explorer. You can open File Explorer by clicking its icon on the taskbar (it looks like a yellow folder) or by searching for it in the Start menu.
What You’ll See On Screen:
When you open File Explorer, you will see a window displaying different locations on your computer, such as:
-
Quick Access: This shows recently accessed files and frequently used folders, allowing you to jump to them quickly.
-
OneDrive: If you use Microsoft’s cloud storage service, your OneDrive files will appear here, accessible from any device.
-
This PC: This section shows your computer’s drives (like your main “C:” drive) and connected devices, such as a USB flash drive. Inside “This PC,” you will also find standard folders like “Documents,” “Pictures,” and “Downloads,” which Windows creates for you.
Creating a New Folder:
Creating your own folders helps you keep your files tidy.
- Open File Explorer and navigate to the location where you want to create the new folder (for example, in your “Documents” folder).
- In the File Explorer window, click “New” in the menu bar at the top, then click “Folder.”
- A new folder icon will appear with its name highlighted. Type a descriptive name for your folder (e.g., “Grandkids Photos,” “Budget 2024”) and press the Enter key on your keyboard.
Moving and Copying Files:
-
To Move a File: This transfers the file from one folder to another. In File Explorer, find the file you want to move. Click and hold down your left mouse button on the file, then drag it to the new folder in the left-hand navigation pane or to another open File Explorer window. Release the mouse button. The file now resides only in the new location.
-
To Copy a File: This creates a duplicate of the file in a new location while keeping the original. In File Explorer, right-click the file you want to copy. From the menu that appears, click “Copy.” Then, navigate to the folder where you want to place the copy, right-click on an empty space inside that folder, and click “Paste.” Now you have two identical files in different locations.
Organizing your files and folders prevents clutter and helps you quickly find what you need. A consistent naming system for your folders, like always starting photo folders with the year, helps immensely. You can learn more about managing your files and computer storage on resources like GCFGlobal — Technology Tutorials.

Personalizing Your Desktop: Making Windows 11 Truly Yours
Your computer should reflect your style and preferences. Windows 11 offers many ways to personalize your desktop, making it feel more like “yours.”
Changing Your Desktop Background:
The desktop background is the image or color that fills your screen. You can choose from built-in options or use your own photos.
- Right-click anywhere on an empty space on your desktop.
- From the menu that appears, click “Personalize.” This opens the Personalization settings window.
- In the Personalization window, click “Background.”
- You will see options to choose a picture, a solid color, or a slideshow.
- To use one of your own photos, click the “Browse photos” button and navigate to the folder where your picture is saved. Double-click the picture you want to use.
- The background changes instantly, letting you preview your choice.
Adjusting Taskbar Settings:
You can also customize aspects of your taskbar, such as its alignment or which icons appear on it.
- Right-click on an empty space on your taskbar.
- From the menu, click “Taskbar settings.”
- The Settings window opens, showing various taskbar options. You can:
- Turn taskbar icons like Search, Task View, and Widgets on or off.
- Adjust “Taskbar behaviors” such as changing the taskbar alignment from center to left.
Experimenting with these settings allows you to create a desktop environment that feels comfortable and efficient for your personal use. You can always revert to the default settings if you change your mind.
Keeping Windows 11 Healthy: Updates and Maintenance
Just like a car needs regular oil changes, your computer needs regular updates and maintenance to run smoothly and stay secure. Windows 11 automatically manages most of this, but understanding the basics empowers you.
Windows Updates:
Microsoft regularly releases updates for Windows 11. These updates can include:
- Security Fixes: Patches for vulnerabilities that could be exploited by malicious software. These are crucial for protecting your computer and personal information.
- Bug Fixes: Solutions for glitches or errors in the operating system.
- New Features: Occasionally, updates introduce new functionalities or improvements to existing ones.
Your computer usually downloads and installs updates automatically in the background. It will typically prompt you to restart your computer at a convenient time to finalize the installation. Always allow your computer to restart when prompted for updates; this ensures your system remains protected and performs optimally.
How to Check for Updates Manually (if needed):
- Click the Start button (Windows logo on the taskbar).
- Click “Settings” (the gear icon).
- In the Settings window, click “Windows Update” in the left-hand menu.
- Click the “Check for updates” button. Windows will then look for and download any available updates.
Security Software:
Windows 11 includes built-in security called “Windows Security” (formerly Windows Defender). This program actively protects your computer from viruses and other malware. Ensure it remains active and updated. You can check its status by searching for “Windows Security” in the Start menu and opening the application. It will show green checkmarks if everything is in order.
Regular updates are your computer’s best defense against new threats and its path to improved performance. Allow your system to update as needed. You invest in your computer’s longevity and your peace of mind.
Troubleshooting Common Problems and Simple Solutions
Even the most advanced technology can encounter a hiccup now and then. Before you panic or call for help, try these simple solutions for common Windows 11 issues. Many problems resolve with basic steps.
1. The Computer is Slow or Unresponsive:
-
Solution: Restart Your Computer. This is the universal first step for many computer issues. A restart clears out temporary glitches and resets your system. To restart, click the Start button, click the Power button icon, then click “Restart.”
-
Solution: Close Unused Programs. Too many open programs, especially those running in the background, can slow down your computer. Close any programs you are not actively using by clicking the “X” in their window’s top-right corner.
2. An App Stops Responding (Freezes):
-
Solution: Force Close the App with Task Manager. If a program freezes and you cannot close it with the “X” button:
- Press the Ctrl + Shift + Esc keys on your keyboard simultaneously. This opens the Task Manager.
- In Task Manager, locate the unresponsive program under the “Processes” tab.
- Click on the program to select it, then click the “End task” button at the bottom right of the Task Manager window. This will force the program to close.
3. Internet Connection Issues:
-
Solution: Check Your Wi-Fi Connection. Click the Wi-Fi icon (looks like curved bars) on the right side of your taskbar. Ensure your Wi-Fi is turned on and you are connected to your home network. If not, click on your network name and then click “Connect.”
-
Solution: Restart Your Router. Unplug your internet router (the box provided by your internet company) from its power outlet. Wait about 30 seconds, then plug it back in. Give it a few minutes to fully restart, then check your computer’s internet connection again.
4. Printer Not Working:
-
Solution: Check Connections and Power. Ensure your printer is plugged in and turned on. If it connects via USB, check that the cable is securely plugged into both the printer and your computer. If it is a wireless printer, ensure it connects to your home Wi-Fi network.
-
Solution: Restart Both Computer and Printer. Turn off your printer, then restart your computer. After your computer restarts, turn your printer back on. This often resolves minor communication issues.
These simple steps resolve a surprisingly large number of common computer problems. Always begin with a restart, as it is a safe and effective first troubleshooting step.
Frequently Asked Questions
Here are answers to some common questions you might have about your Windows 11 desktop.
What is the difference between shutting down and sleeping my computer?
Shutting down your computer turns it off completely, consuming no power (or very little). You should shut down your computer at least once a day or when you finish using it for an extended period. Sleeping your computer puts it into a low-power state, keeping your open programs and documents in memory so you can quickly resume where you left off. It uses a small amount of power. Use sleep for short breaks, and shut down when you are finished for the day.
How do I make text and icons larger on my screen?
You can easily adjust the size of text and icons to improve readability. Click the Start button, then click “Settings” (the gear icon). In the Settings window, click “Display” in the left-hand menu. Under “Scale & layout,” find the “Scale” setting. Click the drop-down menu next to “Make text and apps bigger” and choose a larger percentage, such as 125% or 150%. Your screen will immediately adjust to show the new size.
Can I add my favorite websites to my desktop for quick access?
Yes, you can create shortcuts to websites on your desktop. First, open your web browser (like Microsoft Edge, Chrome, or Firefox) and navigate to the website you want to save. Then, click and hold the icon in the address bar (usually a small padlock or globe icon) on the left of the website address. Drag this icon directly onto an empty spot on your desktop and release the mouse button. A shortcut to that website will appear as an icon on your desktop, allowing you to quickly open it with a double-click.
What does “right-click” do?
A right-click (pressing the right mouse button once) brings up a “context menu” or “shortcut menu” that shows actions specific to the item you clicked on. For example, right-clicking on an empty area of your desktop allows you to “Personalize” your background. Right-clicking on a file gives you options to “Copy,” “Delete,” or “Rename” it. It is a powerful way to access more options without searching through menus.
When and Where to Find More Help
Understanding your Windows 11 desktop might seem like a lot of information at once, and that is perfectly normal. Learning about computers is a journey, not a single destination. Do not hesitate to ask for help when you encounter something you do not understand or cannot resolve.
Resources for Continued Learning and Support:
-
Tech-Savvy Family or Friends: The people close to you who understand computers can offer personalized, patient guidance. Do not be afraid to reach out to them for assistance.
-
Official Microsoft Support: For detailed, specific issues with Windows 11, the official Microsoft Support website provides extensive articles and troubleshooting guides. You can search for your specific problem directly on their site.
-
Online Tutorials: Websites like GCFGlobal — Technology Tutorials offer free, easy-to-understand lessons on a wide range of computer topics, often with step-by-step visuals.
-
Local Computer Repair Shops: For hardware problems, persistent software issues, or if you feel completely stuck, a professional computer repair shop can provide hands-on help. They diagnose and fix problems that are beyond basic troubleshooting.
-
AARP Technology Resources: The AARP Technology Resources page offers valuable articles and guides specifically tailored for older adults, covering various tech topics.
You have taken a significant step by learning about your Windows 11 desktop. Remember, practice makes perfect. The more you use your computer and apply these steps, the more comfortable and proficient you will become. Keep exploring, keep learning, and do not let technology intimidate you. You are capable, and help is always available.
Disclaimer: This article is for informational purposes only. Your computer’s screens may look slightly different depending on your operating system version and settings. When in doubt, consult official support resources or ask someone you trust for help.


Leave a Reply