

You may have noticed your computer acting a bit sluggish lately. Perhaps a favorite website isn’t loading its pictures correctly, or a button you usually click simply refuses to respond. While these issues feel frustrating, they often stem from a very common and easily fixable source: the computer cache. Think of your computer cache like a kitchen pantry where you keep the ingredients you use every single day. Instead of driving to the grocery store every time you need salt, you reach into the pantry. It is much faster, right? Your computer does the same thing with files from the internet and programs you use often. It stores pieces of websites and apps in a “cache” (pronounced just like “cash,” the money in your wallet) so it doesn’t have to download them again the next time you visit. This generally makes things faster.
If your machine still feels sluggish after these steps, you might need to check for other issues, like whether you need to keep your computer safe from viruses or malware.
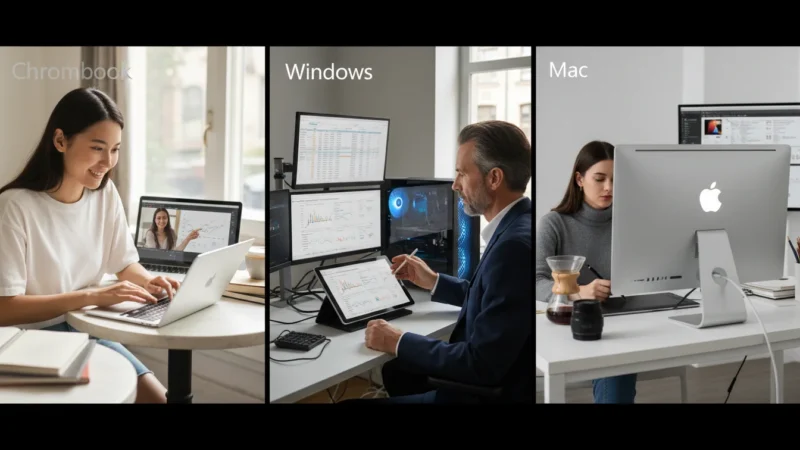
However, just like a real pantry, your computer cache can get cluttered. Sometimes it keeps “expired” versions of a website, or it becomes so stuffed with old files that it actually slows your machine down. Learning how to clear the cache on your computer is one of the most effective ways to maintain your technology and ensure a smooth experience. In this guide, you will learn exactly how to tidy up these digital storage areas across Windows PCs, Macs, and Chromebooks. By the time you finish reading, you will have the confidence to perform this routine maintenance whenever your computer feels a little “stuck.”
Table of Contents
- What Exactly Is a Computer Cache?
- Why You Should Clear Your Cache Regularly
- Clearing the Cache in Google Chrome
- Clearing the Cache in Microsoft Edge (Windows 10 and 11)
- Clearing the Cache in Safari (Mac)
- Cleaning the Windows System Cache
- Cleaning the macOS System Cache
- Clearing Cache on a Chromebook
- Common Problems and Solutions
- Frequently Asked Questions

What Exactly Is a Computer Cache?
To understand the cache, imagine you are a professional baker. Every time you make a strawberry cake, you need a specific recipe, flour, sugar, and strawberries. If you had to walk to a warehouse across town for every single ingredient every time a customer ordered a cake, you would be very slow. To speed things up, you keep a small stash of flour and sugar on your counter. That countertop stash is your “cache.”
In technical terms, a computer cache is a hardware or software component that stores data so that future requests for that data can be served faster. There are two main types you should know about:
- Browser Cache: This stores parts of websites you visit, like the logo of a news site or the background colors of your email page. When you go back to that site, your browser (the program you use to see the internet) pulls those pieces from your own computer instead of downloading them from the internet again.
- System Cache: This is managed by your operating system, like Windows 11 or macOS. It stores temporary files that your computer programs need to run efficiently. Over time, these files can add up to several gigabytes of space.
A “file” is simply a document, photo, or other item saved on your computer. A “folder” is like a physical manila folder that holds these files together. When we talk about clearing the cache, we are essentially telling the computer to empty out those temporary folders and start fresh.
“Clearing your cache does not delete your personal photos, your saved documents, or your emails. It only removes temporary ‘shortcut’ files that the computer can easily recreate when it needs them again.”

Why You Should Clear Your Cache Regularly
You might wonder why we would ever delete something that is supposed to make the computer faster. According to technology experts at Microsoft Support, clearing temporary files is a primary step in troubleshooting performance issues. There are three main reasons you should perform this task every few months.
Emptying the cache is often the first thing to try when troubleshooting common computer problems on your own.
First, it helps with speed and performance. While the cache is meant to speed things up, an overstuffed cache can actually do the opposite. If your computer has to sift through thousands of old, useless files to find the one it needs, it might lag or freeze. Clearing the cache can help speed up your computer by giving it a clean slate.
Second, it ensures privacy and security. Every website you visit leaves a little footprint in your cache. If you share your computer with others, or if you simply want to keep your browsing habits private, clearing the cache removes those digital breadcrumbs. It also removes “cookies,” which are tiny files that websites use to track your preferences (and sometimes your behavior).
Third, it fixes formatting errors. Web developers update their websites all the time. If a website changes its design but your computer is still trying to use the old version stored in your cache, the site might look “broken.” The buttons might be in the wrong place, or the text might overlap. Clearing the cache forces your browser to download the newest, correct version of the site.

Clearing the Cache in Google Chrome
Google Chrome is the most popular web browser in the world. Whether you use a Windows PC, a Mac, or a Chromebook, the steps to clear the cache in Chrome are almost identical. Here is how you do it step-by-step.
Keeping your browser updated is just as important as setting up automatic updates for your entire system.
Learning a few keyboard shortcuts is another great way to make navigating your favorite websites even easier.
- Open Google Chrome by double-clicking (pressing the left mouse button twice quickly) on the Chrome icon on your desktop (the main screen you see when you turn on your computer).
- Look at the top right corner of the window. You will see three vertical dots. This is the “More” menu. Click (press the left mouse button once) on those three dots.
- A menu will appear. Hover your mouse over “Clear Browsing Data.” If you do not see that immediately, click on “Settings,” then look for “Privacy and security” on the left side, and finally click “Clear browsing data.”
- A box will pop up in the middle of your screen. You will see a “Time range” option. Click the small arrow and select “All time” to make sure you get everything.
- You will see several checkboxes. Ensure that “Cached images and files” and “Cookies and other site data” are checked. You can uncheck “Browsing history” if you want to keep your list of recently visited sites.
- Click the blue button that says “Clear data.”
What You’ll See On Screen: You might see a small spinning circle for a few seconds. This is normal! It means the computer is working to delete those files. Once the box disappears, your cache is clear. You may notice that the next time you go to a website like Facebook or your banking site, you might need to type in your username and password again. This is because clearing the “cookies” logs you out for security.

Clearing the Cache in Microsoft Edge (Windows 10 and 11)
If you use a Windows computer, you likely have Microsoft Edge. It is the browser that comes pre-installed by Microsoft. It looks like a blue and green swirl icon. To clear the cache in Edge, follow these steps:
- Open Microsoft Edge.
- Look at the very top right corner. You will see three horizontal dots. Click them.
- Scroll down and click on “Settings” (it usually has a small gear icon next to it).
- On the left-hand side of the screen, you will see a list of categories. Click on “Privacy, search, and services.”
- Scroll down on the main part of the screen until you see a section called “Clear browsing data.” Click the button that says “Choose what to clear.”
- Just like in Chrome, change the “Time range” to “All time.”
- Check the box for “Cached images and files.” You can also check “Cookies and other site data.”
- Click the blue “Clear now” button.
Edge also offers a helpful feature where it can clear your cache every time you close the browser. If you want to set this up, look just below the “Choose what to clear” button for an option that says “Choose what to clear every time you close the browser.” This is a great way to keep your computer tidy without having to remember to do it manually.

Clearing the Cache in Safari (Mac)
If you use an Apple computer (like a MacBook or an iMac), your main browser is probably Safari. Its icon looks like a blue compass. Apple handles the cache a little differently, but it is still easy to manage once you know where to look. To learn more about Mac maintenance, you can also visit Apple Support.
- Open Safari.
- Look at the very top of your entire screen (not just the window). This is the menu bar. Click on the word “Safari” in the top left corner, right next to the Apple icon.
- Click on “Settings” (on older Macs, this may say “Preferences”).
- A new window will open. Click on the tab at the top that says “Advanced” (it usually has a gear icon).
- At the very bottom of this window, look for a checkbox that says “Show features for web developers” (or “Show Develop menu in menu bar”). Check that box. You can now close this small window.
- Now, look at your top menu bar again. You will see a new word: “Develop.” Click on it.
- In the menu that drops down, click on “Empty Caches.”
Safari does not give you a “success” message; it just does the work in the background. If you want to be extra thorough, you can also click on the “History” menu at the top of the screen and select “Clear History.” This will remove cookies and your list of visited sites along with some cache files.

Cleaning the Windows System Cache
Sometimes the problem isn’t your internet browser; it’s the computer’s own internal storage. Windows 10 and Windows 11 have a built-in tool called “Disk Cleanup” that is perfect for seniors because it is safe and easy to use. It specifically targets the “System Cache.”
- Find the taskbar, which is the long bar at the bottom of your screen.
- On the left side (Windows 10) or center (Windows 11), you will see a magnifying glass or a search box. Click inside it.
- Type the words “Disk Cleanup” using your keyboard.
- You will see an app icon that looks like a small hard drive with a brush. Click it to open.
- A small box will appear asking which drive you want to clean. Usually, “C:” is already selected. Just click “OK.”
- The computer will calculate how much space you can save. Then, a list will appear with several checkboxes.
- Check the boxes for “Temporary Internet Files,” “Temporary files,” and “Thumbnails.” (Thumbnails are small pictures your computer creates so you can preview your photos in a folder).
- Click “OK,” then click “Delete Files” when the confirmation box appears.
This process might take a minute or two if you haven’t done it in a long time. It is a fantastic way to free up space on your hard drive, which is the physical part inside your computer where all your files are stored. For more step-by-step guidance on Windows basics, GCFGlobal offers wonderful visual tutorials for beginners.

Cleaning the macOS System Cache
Cleaning the system cache on a Mac is a bit more “hands-on” than on Windows. While macOS is generally very good at cleaning up after itself, a manual clean can help if your Mac feels sluggish. Note: Be very careful in these folders. Only delete the contents of the folders, not the folders themselves.
- Go to your desktop (click anywhere on your background wallpaper).
- Look at the top menu bar and click “Go.”
- Click on “Go to Folder…” at the bottom of that menu.
- A small box will appear. Type exactly this:
~/Library/Cachesand then press the “Enter” or “Return” key on your keyboard. - A folder will open filled with many other folders. These are your app caches.
- You can drag (hold down the mouse button and move the mouse) your cursor over these folders to select them, then right-click and choose “Move to Trash.”
- Important: After you do this, you must empty your trash. Look for the trash can icon on your dock (the bar of icons at the bottom of your screen), right-click it, and select “Empty Trash.”
“If you feel nervous about deleting system files on a Mac, that is perfectly okay! You can achieve a similar ‘refresh’ by simply restarting your computer. Click the Apple icon in the top left and select ‘Restart.’ This clears out many temporary processes automatically.”

Clearing Cache on a Chromebook
Chromebooks are popular among seniors because they are simple and rely almost entirely on the Google Chrome browser. Because the “operating system” (Chrome OS) is basically just the browser, clearing your browser cache handles almost everything.
- Click on the time in the bottom right corner of your screen.
- Click the “Settings” icon, which looks like a small gear.
- On the left side, click “Privacy and security.”
- Click “Clear browsing data.”
- Choose “All time” and check “Cached images and files.”
- Click “Clear data.”
If an individual app on your Chromebook is acting up (like a game or a weather app), you can also clear that specific app’s cache. Go to Settings > Apps > Manage your apps. Click the app that is giving you trouble, click “Storage,” and then click “Clear cache.”

Common Problems and Solutions
Sometimes, things don’t go exactly as planned. Here are a few common hiccups you might encounter and how to handle them.
| Problem | Solution |
|---|---|
| “I cleared my cache, but the website still looks broken.” | Try a “Hard Refresh.” Hold down the Ctrl key and press the F5 key at the same time (on a Mac, hold Command and Shift and press R). This forces the browser to ignore any remaining cache and download everything from scratch. |
| “I can’t remember my password now that I cleared my cache.” | This is common if you cleared your “Cookies.” If you use a physical notebook to store passwords, have it ready. In the future, you can uncheck the “Cookies” box and only check “Cached images and files” to avoid being logged out. |
| “The ‘Clear Data’ button is greyed out and I can’t click it.” | This usually means the browser is still busy or there is a setting preventing the change. Try closing the browser completely and reopening it. If you are on a computer managed by a school or organization, they may have “locked” these settings. |
| “I am afraid I will delete my photos.” | Rest assured, clearing the cache cannot delete your personal files. It only deletes temporary files that the computer made itself. Your photos and documents are safe. |
If you find yourself stuck or if a scary warning message pops up, the best thing to do is stop. You can always ask a tech-savvy family member for help or take your computer to a local repair shop. Organizations like Senior Planet also offer technology hotlines specifically for older adults who need a helping hand.
Frequently Asked Questions
1. How often should I clear my cache?
For most users, clearing your cache once every three months is plenty. If you spend several hours a day on the computer, you might want to do it once a month. You should also do it immediately if a website starts acting strangely.
2. Will clearing the cache make my internet faster?
It won’t make your actual internet connection (the signal coming into your house) faster. However, it can make your computer feel faster because it won’t have to struggle with old, cluttered files. It’s like cleaning the windshield of your car; it doesn’t make the engine faster, but it makes the drive much smoother and safer.
3. Is “cache” the same as “history”?
No. Your “history” is just a list of the names of websites you have visited. Your “cache” is the actual data (images, code) from those websites stored on your hard drive. You can clear one without clearing the other.
4. Do I need to buy “cleaner” software to do this for me?
Generally, no. You do not need to pay for software like “PC Cleaner” or “Mac Keeper.” Your computer has all the tools it needs built right in for free. Many of those paid programs are unnecessary and can sometimes cause more problems than they solve.
Managing your computer doesn’t have to be a source of stress. By taking these small steps to clear your cache, you are taking control of your technology. Much like raking leaves in the yard or dusting the bookshelves, these digital chores keep your environment pleasant and functional. Start with your browser today, and you will likely notice a difference in how your computer responds to your commands. You have the tools, and now you have the knowledge to keep your digital life running smoothly.
Disclaimer: This article is for informational purposes only. Your computer’s screens may look slightly different depending on your operating system version and settings. When in doubt, consult official support resources or ask someone you trust for help.


Leave a Reply